Wednesday 27 February 2013

Try Something New

I love to experiment with new techniques and so I thought I would share with you something I tried recently using Black Scraper Board (also known as Claybord ~ available in art stores such as Blicks).

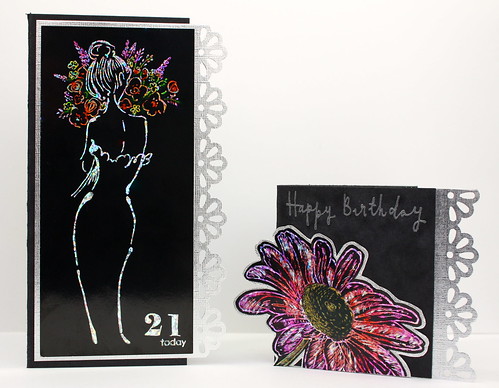
The board has a shiny surface with a black coating on top that can be stamped on and then scratched away to create your own artwork.  I have done a video showing how to do this with the different tools used over on the Penny Black blog today here and this is a sneak peek at what you will find if you hop on over.

IMG_3905

I have two projects using this technique to share with you here, a card and a gift card here they are together.

Scratchbord card and matching tag

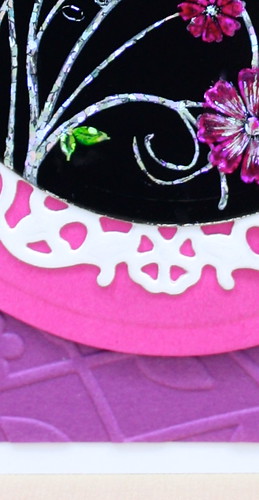
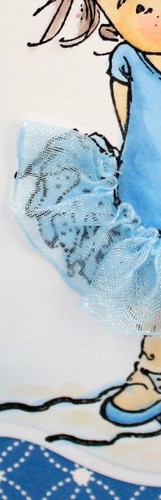
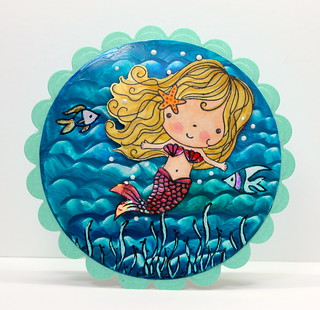
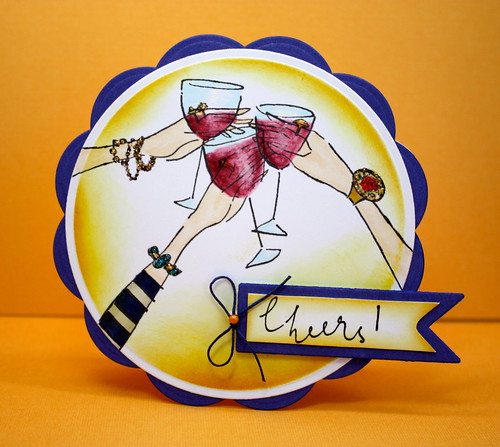
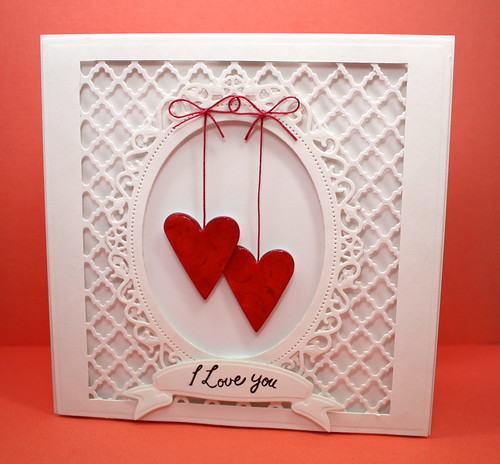
and here are close ups of each individual piece.

Scratchbord card

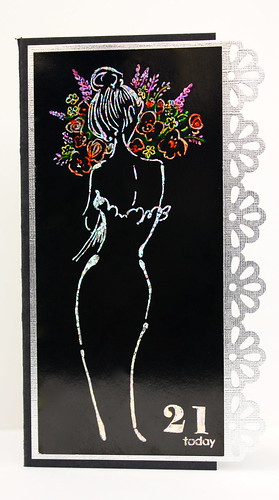
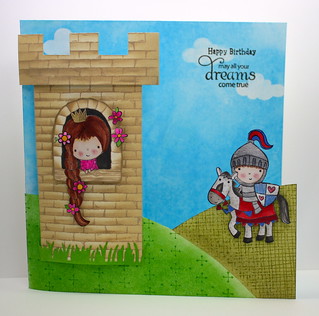
For this card I have used Reflection 40-218, Charms 30-173 and Sentiments 30-025

Flower Tag

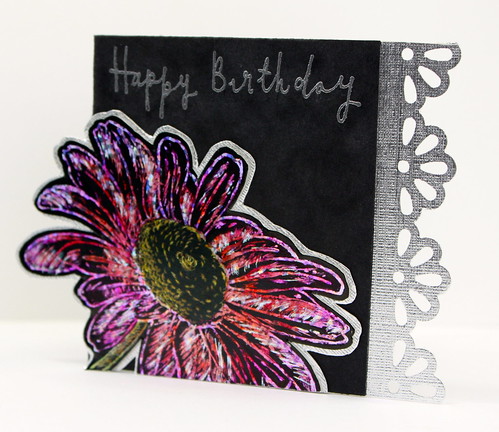
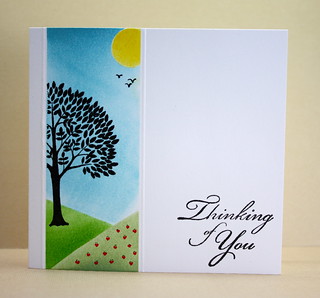
The tag uses Reflection 40-218 and Graceful 4313J

The images don't really do them justice, they really sparkle in real life, thanks for visiting me today and that it inspires you to try something new too!
Hugs Cathy
x


Monday 25 February 2013

Paws for Love

Thank you all so much for your well wishes, they have worked, apart from a lingering cough I am now feeling a lot better!

I was asked by my Husband to make some valentine cards for some colleagues but as I was unwell the coloured images were never finished in time, so I thought I would use one to create this general 'Love' card, who could resist this cute Kitty?

Paws for Love

Materials used: Madison 80-001 Paper pad, Summer Sun 17-002 Mix and Match Card, Embellishments 30-161, Loads of Love 30-146,  Lots of Love 4298J and Spellbinders Labels Eighteen

He has been stamped onto white card using Versafine Onyx Black ink and then coloured with watercolour pencils, cut out using spellbinders Labels Eighteen and then sponged with Ink before removing from die to create a crisp white border. The image was then layered onto Summer sun card and mounted onto a z fold card.

Have a great week everyone, Hugs Cathy
x

Friday 22 February 2013

Just Two Tu

Hi everyone, sorry I have been so quiet on the blog front, but a dreaded flu like bug has laid me low and the craft room has been abandoned in favour of my bed.

I do however have a card to share with you that I had previously made to submit to a craft magazine, I love the little tutu on it and couldn't resist adding a touch of ribbon to the design.

Just Tu Two

Materials used:- Tutu Sweet 30-154, Sentiments 30-025, Copic Markers E50, E51, R20, E70, E71, E74, RV10, RV93, E41 and E81, Atyou Spica Clear Pen, Spellbinders Grand Nesting Squares and Pink glitter die cut number, Versafine Onyx Black Ink, Clear Embossing Powder and Pink Sheer Ribbon.

I have a project and video showing how to colour in the little girl and create the tutu on the Penny Black Blog here.

IMG_3897

Thank you for visiting me and for all your well wishes, hope to be back sharing more projects soon.
Hugs Cathy
x

Friday 15 February 2013

Wax and Scratch Sea Scene

I was lucky enough to be sent some of the new Design Memory Craft Faber Castell Paper Crafter Crayons which have an amazing high wax content.  This allows you to melt the wax and create fabulous background effects.  I decided to have a go at creating a seascape.

Wax and Scratch Sea


Materials used: Gloss and Matt white cardstock, Penny Black Sea Breeze Mix and Match cardstock 08-001, Strawberry Fantasy Film, Spellbinders Large Circle and Scallop Circle die, Design Memory Craft Faber Castell Paper Crafter Crayons and Stampers Big Brush Markers Orange Glaze and Pink Madder, Copic Markers, Ranger White Enamel Accents, Staz-On Jet Black, Memento Tuxedo Black, Penny Black Beach Day 30-051 and Mimi The Mermaid 4186K stamps.

*Cut circle from gloss card, add three shades of paper crafters crayon to the sole of a hot iron and run across card in a sweeping motion.  Add wave pattern using the tip of the iron to move wax around.
*Stamp seaweed and fish with Staz on and then scratch away wax to reveal white card underneath.  Colour fish with Big Brush markers and fantasy film.
*Stamp Mermaid onto white card using Memento ink colour with Copics and cut out.
*Ink Mermaid Stamp with Staz-On, place two layers of Fantasy Film on top and then Iron to fuse film.  Cut out tail and shells and adhere to main image. Add Mimi to card blank.
  • Add bubbles with enamel accents and then mount onto Seabreeze card blank cut using scallop die.

Tips: To make circular cards more stable, cut a small edge off the bottom of the card.

I will be back with a different type of scratch project soon, until then have a wonderful weekend.
Hugs Cathy
x

Wednesday 13 February 2013

Cheers me Dears!

We are half way through the week, so I need no more excuse to celebrate.....and here is the perfect card to set the mood.

Raise a toast

Materials used:- Penny Black Cheers 40-219, Periwinkle 11-003 and Storm 01-001 Mix and Match Cardstock, Spellbinders Grand circles and Scalloped Circles and Nested Pennants.

I love shaped cards, I think they add great dimension to a project, this card was so easy to make using spellbinders nesting dies and by leaving the cardstock in the die I was able to ink the inside edge of the design with Tim Holtz Wild Honey and Mustard Seed distress inks and have a lovely neat white border around the edge.

The main image was coloured with Copic markers and the gems sparkled with a touch of stickles. Tip: to get the watery effect on the wine I used a blender pen and touched the tip to a red pen to pick up some ink and then used the blender to colour the glass.

The design was finished off with some twine and a small pearl.

I hope you have something nice to celebrate about this week too!
Hugs Cathy
x

Monday 11 February 2013

Fancy Valentine

There is still time to create a special card for a loved one, for Valentines or for a special Anniversary, here is a card that I think will fit both occasions.

Fancy Valentine

Materials used: Beep Beep 30-092, Sweet Melody 40-195 (the tail was used to add a soft pattern to the hearts). Spellbinders Fancy Lattice, Floral Oval, Ribbon Banners and Grand Nesting Squares.

This card is so easy to make using spellbinders die cuts to create a fancy frame, did you notice that the sides of the square frame were wider than the top and bottom?  I did this to make the proportions of the oval look better by cutting the inside of the frame using a craft knife.

Get more out of your stamps by using just using parts of them, for example on my chipboard hearts I stamped the tail of the bird from the sweet melody set and I also cut the "I Love" part of the clear stamp from the "You" part so that I could have it all on one line.

Don't forget that Penny Black has some amazing inspiration on their "Twenty Days of Stamping"

blog graphic

Enjoy your week, hugs
Cathy
X

Saturday 9 February 2013

A Notelet Gift Set


Hi everyone, I hope you are having a wonderful weekend, Penny Black are doing a blog marathon and today I am sharing this notelet set. Here is a sneak peek ....to see the full project and a video tutorial hop on over to the Penny Black Blog here.

IMG_3877 - Version 2Materials used:
Penny Black - Blissful 40-205, Edge to Edge 30-164, Tree-mendous 30-165, Friendship 30-160, Embellishments 30-161, To You 30-067, Mix and Match Cardstock - Fern Green 05-001, 05-003, Summer Sun 17-003, Clear Skies 10-003 and Fuchsia Fantasies 13-002.


Other: Versafine Onyx Black Ink, Versamark Ink, Various colours of Memento Ink, Clear and White Embossing Powder, Spellbinders Labels 20, Alcohol Pens, Envelopes, Vellum and White cardstock.

I hope you have enjoyed visiting me today, and that you take time to checkout the amazing projects on this 20 days of stamping enjoy the rest of your weekend.

Hugs Cathy
x

Friday 8 February 2013

Miles to the Rescue!

When the Mimi at Play 30-111 came out, I just had to put her in a tower, but alas there was no one to rescue her, but as the fairytale goes, after years of being locked in the tower a knight in shining armour arrives with Mimi in the Playground 30-147.

Rescue Me

Can you guess how many Penny Black stamps were used on this card?  Scroll to the bottom to see if you were right and for the full list.

Did you notice the front hills are cut away and that the sky is actually the inside back of the card?  I also added some gilding flakes to her crown and the knights armour is actually pieced from plumbers aluminium tape that has been distressed with a wire tool.

The background and foreground has been inked with Tim Holtz distress inks and masks were created from Amuse Cloud dies for the sky.

To make the stonework more realistic I added a darker shade to the bottom part of each brick and
tried to create the illusion of dimension by making the sides slightly darker.

Did you guess how many stamps were used?  There were 7 in total: Warm Wishes 40-074 (grass hill to the right), Zen 40-051 (grass hill to the left), Brick Wall 40-137 (tower), Mimi at Play 30-111 (Mimi in the tower), Mimi's Playground 30-147 (knight in armour), Bear of All Trades 30-108 (Happy Birthday sentiment) and Sweet Wishes 30-104 (dreams sentiment).

Have a lovely weekend everyone.
Hugs Cathy
X

Wednesday 6 February 2013

Summer Meadow

Today I have a clean and simple summer meadow design to share with you.

Summer Meadow

Used: Gratitude 30-105, Splendor 3977H and Storm 01-001.  Other Materials included: Tim Holtz distress inks tumbled glass, broken china, mowed lawn, peeled paint and mustard seed. Versafine ink and clear embossing powder. Design Memory Craft Faber Castell Pitt Artist Pens (birds and flowers).
  • Mask card with post it notes to leave a rectangular panel on the left side and add curved mask to create hills and a circular mask for the sun. Ink sky, hills and sun with distress markers using a blending tool - leave to dry. 
  • Ink tree with versafine and stamp off centre, cover with clear embossing powder and heat.
  • Draw in flowers and birds with Pitt Artist Pens and dry emboss lines down either side of the panel
  • On the right side stamp the sentiment and emboss with clear powder.

  • Tip: work from the post it note onto the card to get an even blended background. Tip: To get a smooth curve on the post it note for the hills use a bendy ruler.
Don't forget to check out the Penny Black blog for the 20 days feature and a chance to win 20 
stamps!

Hugs Cathy x

Monday 4 February 2013

Counting Owls

Hello  and Happy Monday everyone, before I share my post today; I want to let you know about an amazing event that is happening over the next 20 Days ........it is


If you visit the Penny Black Blog  there will also be details on how to win 20 new stamps!


Today I thought I would share with you this cute transparent set Bugsy and Owly 30-110 on a personalised age card.


Look Whoo's 4

Other materials used include: Storm 01-001, Sticks and Stones 02-002, Fern Green 05-001 Mix and Match Card Stock, Charms 30-173 transparent set, Indian Wheel 40-202 Cling, Prisma Pencils, Versafine Black ink, Spanish Moss and Vintage Sepia ink, Memento Pear Tart Ink, and Martha Stewart  Double Scallop punch (only one layer of scallop is visible in the card).

Tips: to make the numbers stand out more I outlined with a fine liner pen and I also added some lines to the trunk using vintage sepia ink and a inkessentials nib.

Have a great week everyone, hugs Cathy
x