So I thought I had better spruce myself up for such an announcement and make my hair look nice...but what with? Yes a posh hair slide...but I need to make it first, scroll down for a video tutorial!
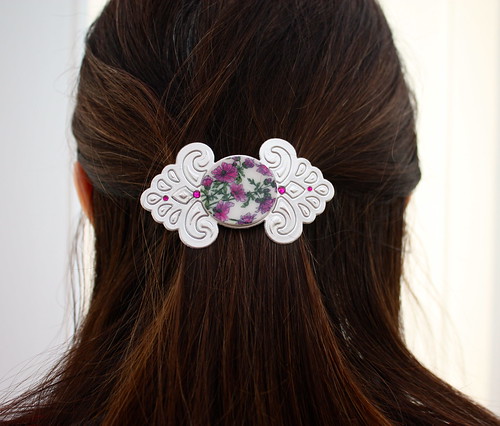
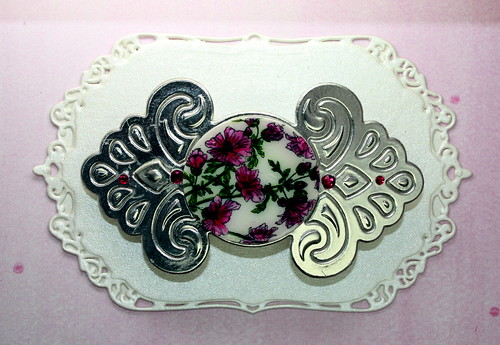
Now do I go with the Pink...
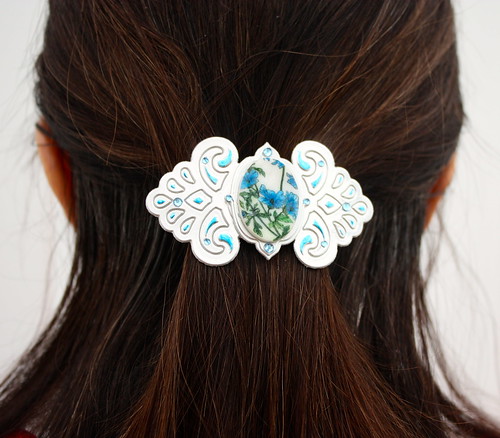
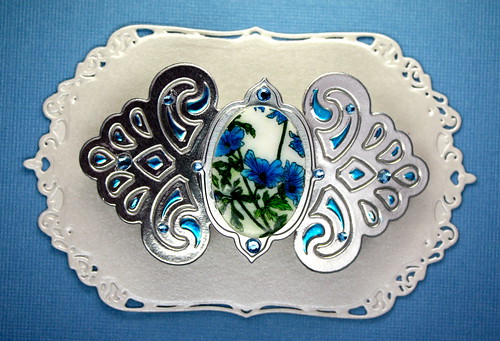
or the Blue?
These are so easy to create, here is a step by step guide for the pink one
1) Adhere a piece of metal to silver card (to add strength to the design) and then run it through the Grand Calibur GC-001 using the Moroccan Accents S5-064 Die - Metal side down. (you may need to run it through a couple of times due to the thickness of the metal and card). Tip: Use wax paper to make the metal release from the die easily. Run through the machine again using the embossing mat - this will ensure the metal does not have sharp edges. Attach to a blank barrette bending slightly to fit to shape - I use hot glue for this.
2) Cut a piece of shrink plastic using Spellbinders Standard Circles Large S4-114 2¾″ Die, on the rough side stamp Penny Black's Trailing Beauty 40-207 cling stamp using Staz On Olive Green Ink, allow to dry and then colour with Design Memorycraft Faber Castell Aquarelle Pencils. I have used 119, 125 and 168 (from the Reds and Greens collections). Tip: To smooth and blend colours go over coloured areas with a barely damp water brush. Then shrink using a heat gun, it will curl up during shrinking but will straighten out again when finished - if it is slightly kinked then flatten with a stamping block.
3) Attach shrunk disk to centre of the moroccan metal cut out using Ranger glossy accents and then seal disk with a coat of glossy accents (this would look better if you use Ice Resin - but mine is still on order). Add a few gems to finish off and your hair barrette is complete!
Variations: The blue barrette was made in the same way, with the following exceptions:-
I coloured the metal embossed areas using a Copic marker pen (any alcohol based pen would work on metal) and then cut a second mount out of metal using Opulent Ovals S5-160, for the shrink plastic I used Classic Ovals Small S4-112. The blue flowers were coloured using 144 and 147
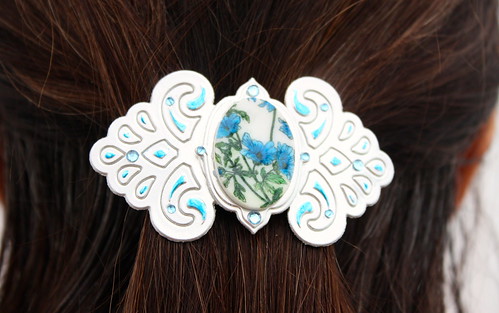
Here are a few more close up shots of both Barrettes

If you want to make these, they look great as a gift it mounted on Spellbinders Gold Labels Four S5-159.
Thank you for visiting me today and sharing my exciting news, don't forget to check out the Penny Black blog this week for more inspiration.
Hugs Cathy
x


18 comments:
Wow, beautiful barrettes Cathy!Congratulations on your exciting news! I look forward to seeing all your projects!
CONGRATS on your BIG news, Cathy! You are the PRO for this DT! You are always full of knowledge and know-hows with cards and altered projects! Spellbinders is lucky to have you on board! Way to go, sistah!
Congratulations. You're so inventive, creative and I'm so happy for your good news!
woohoo congratulations..so excited for you.. You will do amazing things because you rock.. these barrettes are gorgeous...
wow - that is one inspired project Cathy - and congratulations on your recognition by Spellbinders.
Blessings
Maxine
Congratulations, and your barettes are stunning! I see they are not cut right through just the edges. Now I need to get these dies and try this myself!
Do you think it would be OK if I sold them in a craft shop? It is your idea, so up to you. I normally just sell cards, I would maybe put them on a card as a gift and card together.
Cazzy x
Congratulations. Your inventiveness never ceases to surprise me..... these are super showpieces & so apt for the occasion.
Paula (PEP)
Huge Congrats Cathy, your projects are always amazing and you really think out of the box.. These hair clips are gorgeous!
wow! this project simply took my breath away! stunning!
A very clever idea. The shrink plastic with stamping colored looks wonderful. Great job!
quilt 4 fun 2 at hot mail dot com
Big congratulations, Cathy! How exciting! Your barrettes are just beautiful--perfect illustration of your creativity!
Fabulous idea Cathy x
MEGA CONGRATS to You Cathy!
They are so smart and so lucky to have you!!
Your talent and creativity know NO limit!
I love your Barrettes and I'm excited to see your future projects!
These are totally gorgeous Cathy and what a fab idea!
these are lovely! thanks for sharing
such a pretty project and great tutorial! I really enjoyed watching the video and who wouldn't love one of those to wear in their hair!
I love this project you created but I have some questions--
are the metal sheets the same as the metal used with the artisan explorer or is it metal looking papers? Can the metal that spellbinders uses for the artisan be used in the grand caliber on this project? Also where do you get those stick square sheets? Did you cut it down from a larger size or is that how it comes from the store?
If you have a complete supplies list or where you get the products that would be great.
Thank you for your time and creativity.
Heather, it is actually metal, but not the spellbinders Mixage brand which I believe is thicker, I got mine from a German company called Follia it that helps, here is a link to the product page for their metal http://www.folia.de/fileadmin/epaper_katalog_2013/mobile.html#/page/214
Post a Comment