Friday, 29 November 2013

The No Scissor Gift Box


All this week I have been sharing some Christmas Inspiration over on the Penny Black Blog, today is my last day; I would love you to hop on over and leave me any comments or thoughts on the projects I am sharing.

Today I want to share a really sweet little gift box that requires no cutting, so is perfect to make with children! (I can't take credit for the box design as I have been shown this box shape by many people).

Here is the front

Gift Bag Front

and here is the back

Gift Bag Back

Now for the list of supplies:-
Penny Black Blue Lagoon 09-001 Mix and Match Card, Peace and Joy 30-203 and Seasons Wishes 30-201 Transparent Stamp Sets, Starry Night 10-222 sticker set, Memento Espresso Truffle, Teal Zeal  and Rich Cocoa inks, Versafine Deep Lagoon Ink and White Seam binding.
A scoring board tool would also be useful for this project.

Now for the how to....

I hope you have enjoyed this week and that it has inspired you for some Christmas creativity.
Hugs Cathy
x

Thursday, 28 November 2013

Time to Stuff Your Stockings......


All this week I am sharing some Christmas Inspiration over on the Penny Black Blog, I would love you to hop on over and leave me any comments or thoughts on the projects I am sharing.

It is a fabulous thing to hang your stocking and then wake to find it full of goodies on Christmas morning, but what if you don't own a stocking?  Fear not, because today's tutorial will show you how to make your very own!

I am using a stocking template readily available on line here at Seam Star.

Winter Stocking

Supplies to create this project:- Penny Black Christmas Hug 4357K, Decadence 40-254, Calico Fabric, Red dotted satin ribbon, kreinik metallic thread, Imagine Crafts/Tsukineko Memento Luxe Tuxedo Black and Love Letter  Ink, Ink Potion No. 9, All Purpose Inks; Poppy Red,  Cherry Pink, Peony Purple, Apple Green, Lemon Yellow, Cerulean Blue, Emerald and Platinum, Versamagic Turquoise Gem, Spellbinders A2 Filagree Delight S5-177.

I have also used a sewing machine and an air brush for this project, but you could sew by hand and apply the ink by sponge if you do not own these tools.

And now for the video.....


Well we are almost at the end of our week of classes come back tomorrow for the final one in this series!
Hugs Cathy
x

Wednesday, 27 November 2013

Ornamentally Wood Veneer


All this week I am sharing some Christmas Inspiration over on the Penny Black Blog, I would love you to hop on over and leave me any comments or thoughts on the projects I am sharing.

My Inspiration for this project came from a call for an ornament swap with Imagine Crafts/Tsukineko, I just had to take part, but wanted to be able to share my ornament idea with everyone, even if I don't have the time to send each and every one of my blog readers one, you can enjoy a virtual one here!

A natural wood version, front:-
Wood Ornament Front

A natural version, back:-
Wood Ornament Back

A coloured version, front:-
Coloured Ornament Front

Coloured version, back:-
Coloured Ornament Back

Supplies used:-
Wood Veneer, Penny Black Holly Concert 4337K stamp, Love and Joy Die 51-021, Christmas Harmony 30-194, Imagine Crafts/Tsukineko Delicata Golden Glitz Ink, Versafine Vintage Sepia Ink,
All Purpose Inks Poppy Red, Emerald, Lemon Yellow, Goose Bumps Shimmer Spray and Ink Potion no.9,  Shimmer Spritz Sparkle, Versamagic Hint of Pesto, Sahara Sand, Turquoise Gem and Oasis Green, Brilliance Pealescent Crimson, Copic White, Spellbinders 2010 Heirloom Ornaments S4-283 , Stix 2 Double Sided Tape A4 sheet, Black marker pen, Copic B04, gold tassel.

Well now I have covered the mighty list of supplies for this project all that remains is for me to share the video.


Now it is your turn to start making your christmas ornaments.

hugs Cathy
x

Tuesday, 26 November 2013

A Children's Christmas Activity


All this week I am sharing some Christmas Inspiration over on the Penny Black Blog, I would love you to hop on over and leave me any comments or thoughts on the projects I am sharing.

There is nothing more fun than being able to share crafting with your children, grandchildren or a group of eager little ones and as Christmas approaches they love nothing more than to make their own decorations.   Today I have two videos, one for the children and one for the adults on how to create your own window clings.

First up are these super sized clings...

Will it snow window cling

Christmas Snow window cling

These were created using the following supplies:-
Penny Black cling stamp set White Christmas 40-255, white PVA glue, Black Pan Pastel, Brilliance Sky Blue re-inker, Tsukineko All Purpose inks; Cerulean Blue, Green Apple, Lemon, Tangerine and Poppy Red, Baby Blue glitter.

I have made a video to show you how to make the window cling  medium.


I then wanted to show how to create a window cling for a stamp that had more detail and therefore would not suit the first method used and so I created this window cling using these supplies:_

Poinsettia window cling

Instructions for this cling can be found on this video


There is no limit to the number of clings that you can create, whilst making these I tried a few others as samples and thought I would share them here, I used Penny Black's Build-a-Snowman 30-200 and Festive Forest 30-197. You could also make some with some of the butterfly stamps to adorn your windows in the summer!

Hugs Cathy
x

Monday, 25 November 2013

Have A Merry Etched Wine Glass on Me This Christmas


All this week I am sharing some Christmas Inspiration over on the Penny Black Blog, I would love you to hop on over and leave me any comments or thoughts on the projects I am sharing.

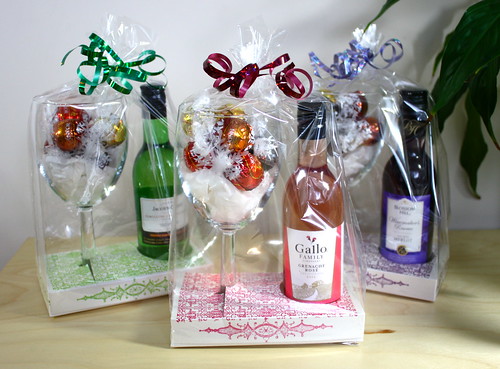
I love to make my own Christmas gifts, that way I know there is no chance of the same gift being given by someone else.

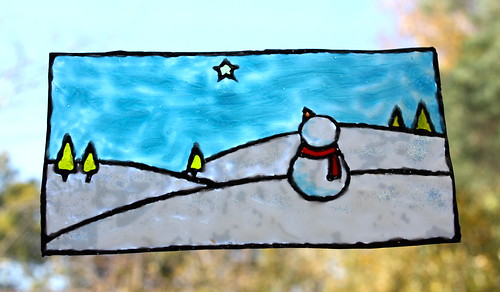
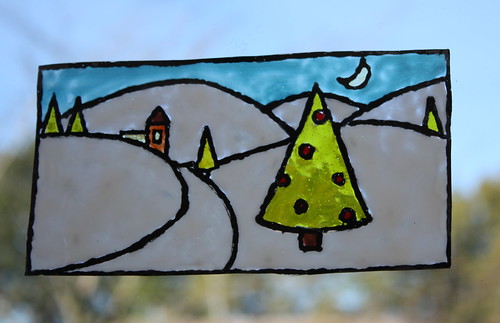
Today I would like to share a really cool technique often referred to as chemical glass etching, it is so easy to do...these were my first attempt and are quick too!

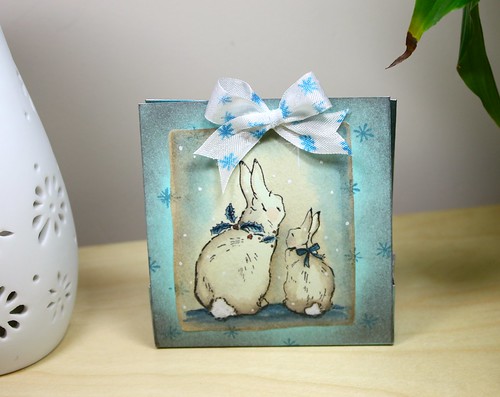
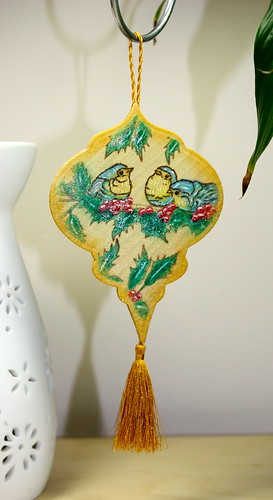
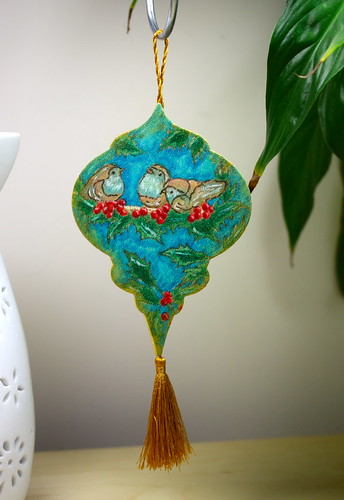
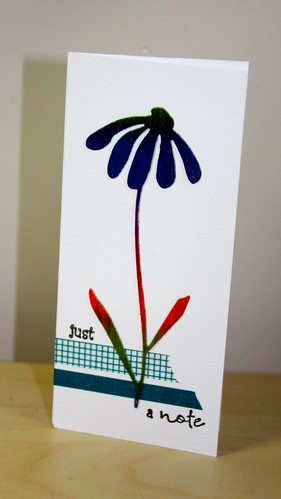
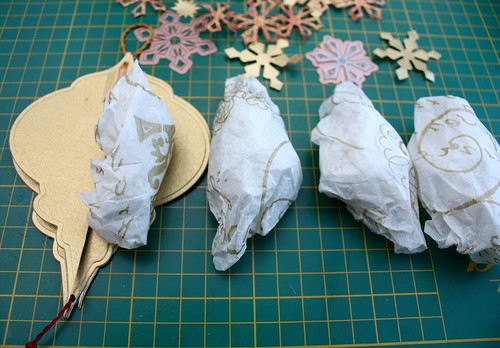
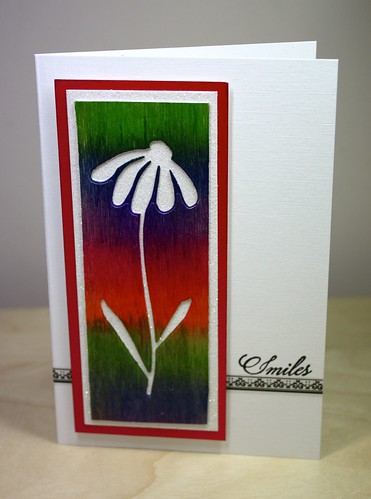
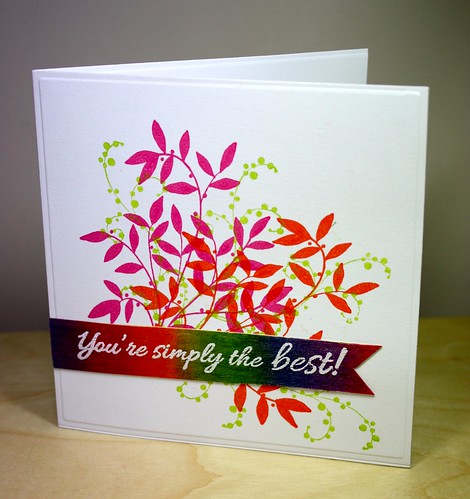
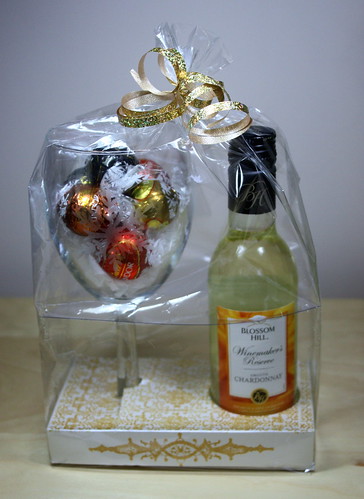
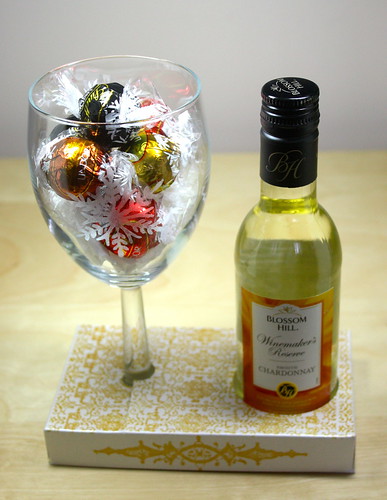
 Here are some of the finished gifts all wrapped up and ready to give....

Christmas Etched Gift Sets

Christmas Etched Wine set

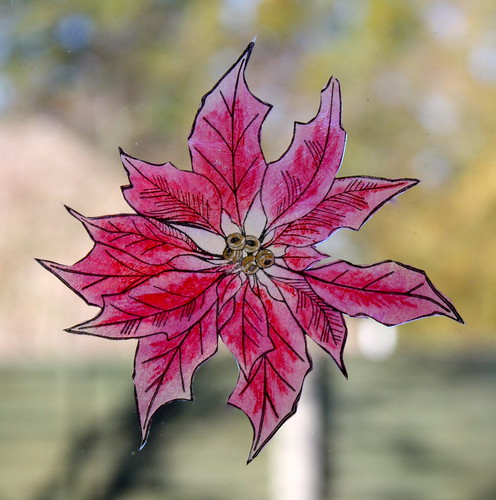
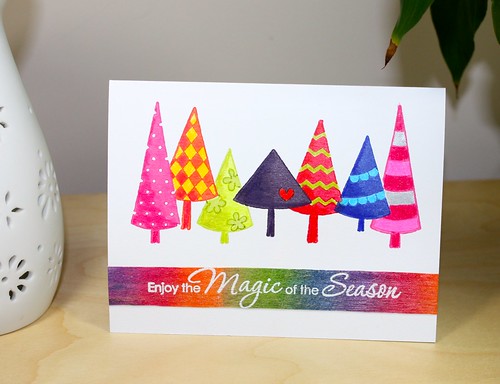
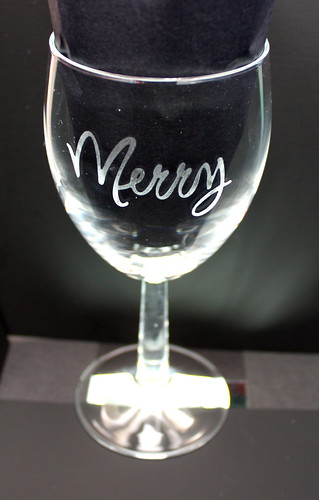
Here is a close up of the front of the glass after it has been etched

Christmas Wine Glass Front

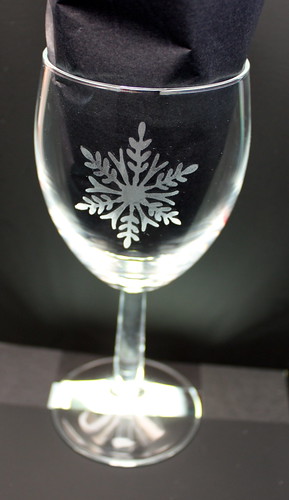
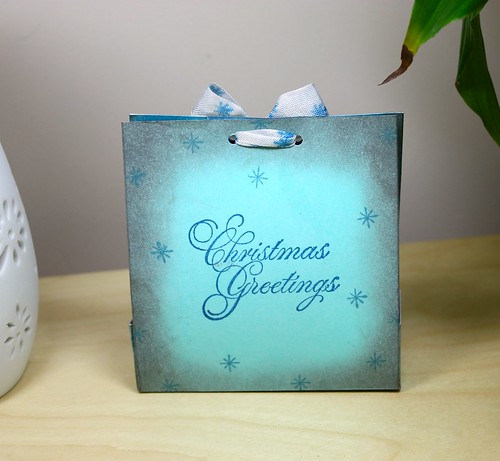
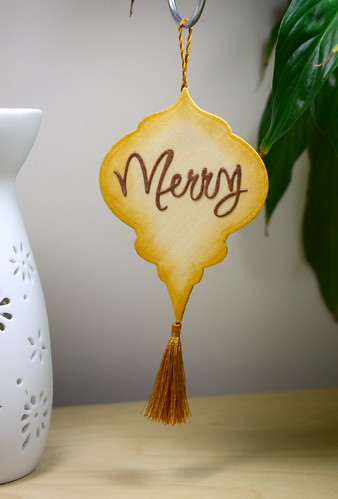
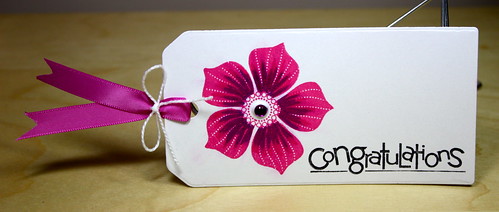
And here is a close up of the back of the glass, the sentiment comes out really crisp - I am sure after a few glasses of wine the holder will definitely be Merry!

Christmas Wine Glass Back

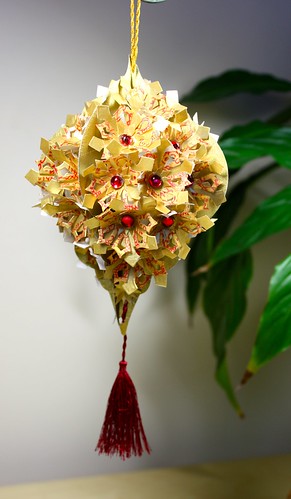
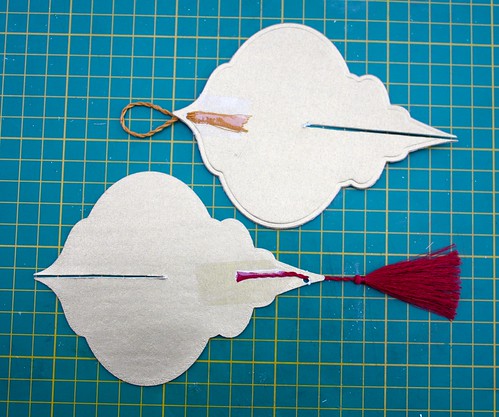
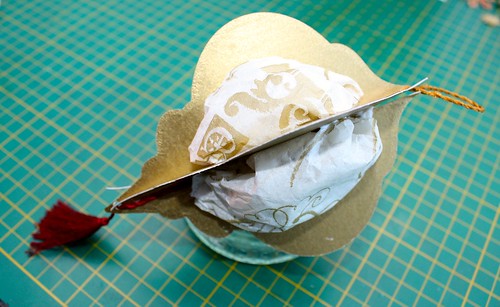
and finally a picture showing the base packaging

Packaging of etched wine glass

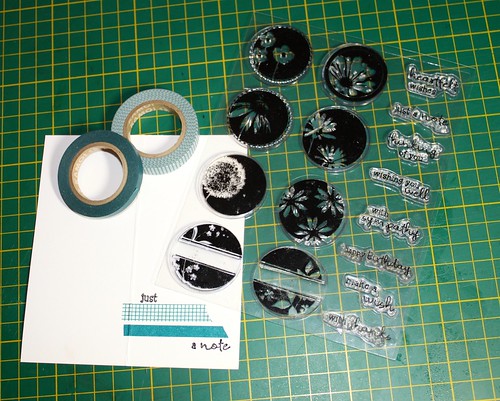
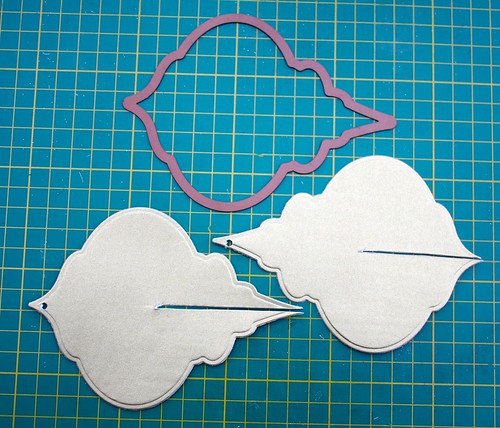
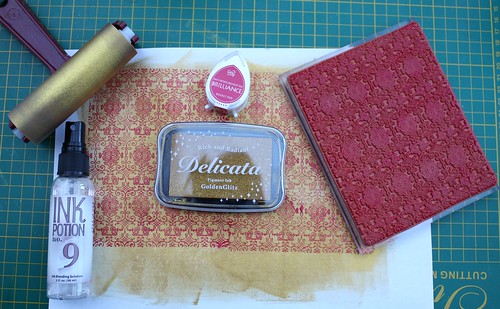
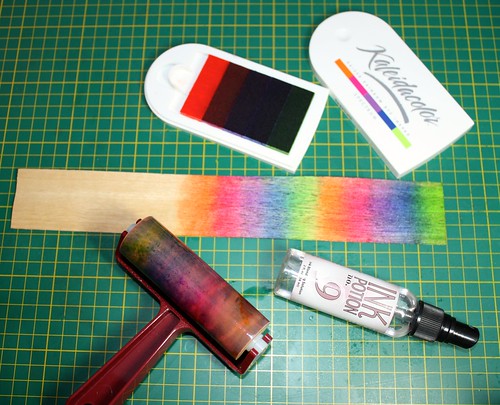
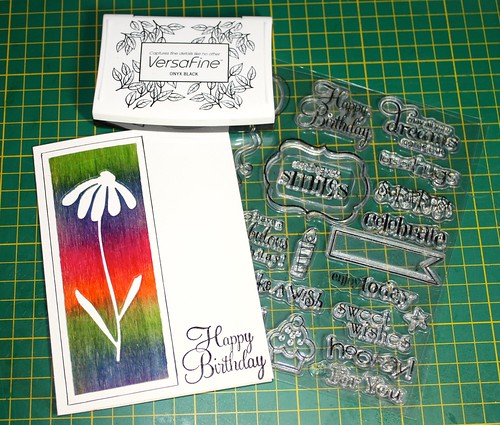
So how do you do it you ask?   Well scroll on down and I will explain all in the video, but first you will need to gather some supplies:-
Armour Etch Glass Etching Cream, Wine Glass, Some Chocolates and a Bottle of Wine (these are essentials even if you don't plan on trying the glass etching!) Pearl White Card 19cm x 24cm, 
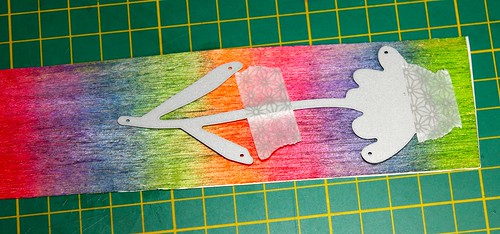
Gold Staz-On Ink, Penny Black Dies 
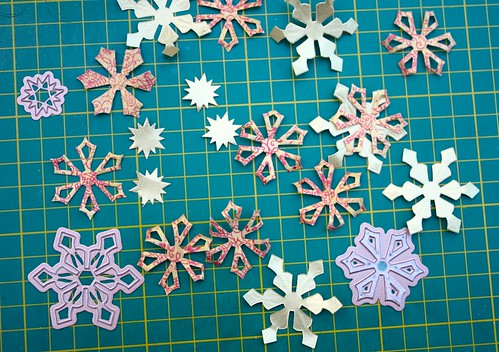
Snowflake Trio 51-015 and Love and Joy 51-021, Decadence 40-254  and 
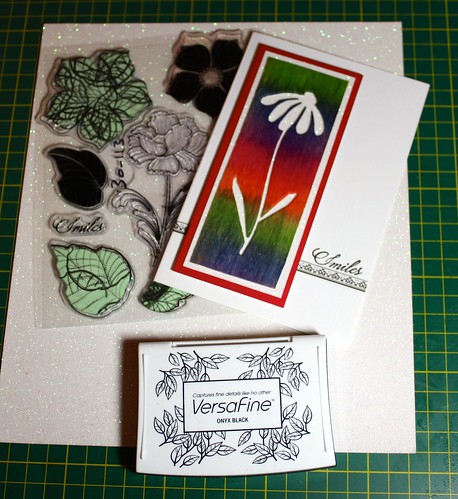
Ornately Stamps 40-252, Spellbinders Standard Circles Sm S4-116  and Lg S4-114, Protective rubber gloves and  Silhouette Adhesive Vinyl. (In the top photo I also used Staz On Imperial Purple, Blazing Red and Cactus Green inks to co-ordinate with the wine bottles).  Caution Armour Etch is an acid and must be used with extreme caution, please make sure you follow all the instructions and guidelines on the back of the packaging.

So now you have all the supplies you can sit back and watch the how to....enjoy


Don't forget the Love sentiment in the die set would make a great valentine version too!
I hope I have inspired you today to have a go at making your own Christmas Gifts. Have a great week, Hugs, Cathy
x


Friday, 22 November 2013

What more from that strip of veneer?

Yes, as you can see from some of my earlier posts; one little strip of veneer can go a long long way!

This time I am using the actual die cut flower from the last card, to create a little note-let.

Flower note

Supplies:- Penny Black Storm 01-001 Mix and Match card, Bashful Die 51-008, Wishes 30-103 transparent set. Imagine Crafts/Tsukineko Versafine Onyx Black ink, Kaleidacolor Spectrum Ink, Ink Potion No.9, Teal Washi tape (sorry I don't know make bought from FAB.com) and Stix 2 A4 double sided adhesive.

* Fold card blank, add Washi Tape and stamp sentiment.

materials flower 3

* Attach Die (see previous post on how to successfully cut veneer) cut and voila your card is complete!

The best news, is I still have a scrap of veneer left, so watch out you may see it appear on a card here soon! Have a great weekend. Next week I have something special to share, here is a clue  or should I say not so subtle hint as to what is coming on the Penny Black Blog......


Hugs Cathy
X

Wednesday, 20 November 2013

The Great Spellbinders and Preferred Partner Blog Hop


I am so excited to be joining in this amazing Christmas blog hop and there are lots of opportunities to enter the competition along the way, so don't forget to scroll to the end of this post to find out how.

First to share my Project a hanging ornament.

Christmas Ornament

To create this ornament you will need:- Spellbinders 2010 Heirloom Ornament S4-283, Create A Flake 3 S4-340, Imagine Crafts/Tsukineko  Rocket Red Brillance Ink, Delicata Golden Glitz Ink and Ink Potion No.9, Penny Black Decadence 40-254 Cling mounted stamp, gold card, white paper, tissue paper (gold if you have it) and a tassel.


Christmas Ornament
  • Cut ornament out twice from gold card and put a slit half way up on one and half way down on the other and add a small hole punch as seen in the image above.
Christmas Ornament
  • Attach tassel to hole and a loop to the top.
Christmas Ornament


  • Ink Brayer with golden Glitz ink, spritz with Ink Potion No.9 and brayer onto white paper, then add Rocket Red Brilliance ink to Decadence stamp and stamp over the top, set aside to dry

Christmas Ornament
  • Cut out snowflakes using the stamped paper and plain gold paper. You will need a lot to go round the whole ornament (at least 36 of each design)
Christmas Ornament

  • Scrunch up some tissue paper (if you have gold it will look better - but I only have white so it shows through a little)

Christmas Ornament
  • Glue tissue paper to each section of the ornament as shown above.

Christmas Ornament

  • Shape snowflakes with a round ended embossing tool and then glue to tissue paper until the whole of the section is covered.
Christmas Ornament
  • Add gems to the centres of the snowflakes to complete the ornament.

Today's other blog hoppers are 

and

Now for the most important bit....to be able to enter the contest you must visit the Imagine Crafts/ Tsukineko blog Here.

For a list of the rules for entry to the competition please visit Spellbinders here, and for a list of all the partner companies participating in the blog hop please visit 

Thank you for visiting me today and good luck in the competition!

Hugs Cathy
x

Monday, 18 November 2013

Flower Veneer

Hello again, hope you had a good weekend, as promised; I am continuing to share the cards that I created from one strip of veneer wood.  Today I wanted to share how to die cut the veneer so that it doesn't split and break.

Sparkle Flower

Supplies: Penny Black's Bashful Die 51-008, Petal Party 30-113 transparent stamp set, SRM border sticker, Wood Veneer, White Glitter Card, Pink Pearlescent and White Linen Card, Stix 2 A4 double sided adhesive sheet and Imagine Crafts/Tsukineko Versafine Onyx Black Ink, Kaleidacolor Spectrum Ink and Ink Potion No.9.

* Ink brayer with Kaleidacolor Ink, spritz with Ink Potion No.9 and brayer onto wood veneer, heat set.  Add adhesive sheet to back (this will prevent it from splitting and cracking when put through the die cutting machine).

Technique flower 2

* Attach die to wood veneer and run through die cutting machine (you may need to do this a few times to make sure that it cuts through both the wood and adhesive layers.

technique flower 1

* Trim to size and mount onto glitter and pearl card.

* Stamp sentiment with Versafine ink and add SRM border below. Add veneer panel to finish.

materials flower

I originally mounted the wood directly onto white card but then decided I wanted it to have more layers so I thought I would share the alternative version here. I Used Penny Black's Sweet Wishes 30-104 for the sentiment on this version.

materials flower 2

Thank you for visiting me today, I will have another veneer creation to share with you on Wednesday.
Hugs Cathy
x

Friday, 15 November 2013

When Is A Christmas Stamp not A Christmas Stamp?

Answer:-
When you use it to make an encouragement card!!!

Yes my annual motto has resurfaced a "A Christmas Stamp is for Life not just for Christmas"

And to prove my point two of the stamps on this card are from the Penny Black Christmas release.

The Best

Supplies used:- Penny Blacks Edge to Edge 30-164 transparent stamp, Christmas Reds and Greens 4347K and Blushing Berries 4355F Wood Stamps, Storm 01-001 Mix and Match Card stock, Imagine Crafts/Tsukineko Kaleidacolor Spectrum Ink, Wedding Dress, Morocco, Pear Tart and Rose Bud Memento Luxe Inks, Ink Potion No.9, White embossing powder, Spellbinders Grand Squares LF-126 and Wood Veneer.

* Ink up brayer using Kaleidacolor ink  and spritz with Ink Potion No.9, brayer onto wood veneer and then heat set. Stamp sentiment with Memento Luxe Wedding Dress ink and heat emboss. Cut out to form tag shape.

Technique flower 2

* Create card blank by folding cardstock in half and cut and emboss using Spellbinders grand squares (make sure the fold on the card is inside the cut line).

* Stamp leaves using Memento Luxe colours, then add tag over the top to finish card.

I will be back on Monday with another veneer creation, until then have a great weekend, what ever you have planned.
Hugs Cathy
x

Thursday, 14 November 2013

A Colourful Christmas

I have been getting inky this week whilst experimenting with some wood veneers, I have discovered that from one strip of wood veneer about 2" x 12" you can create 4 very different cards, here is the first one...with others to follow soon.

Colourful Christmas

Supplies: Penny Black Inc. Festive Forest 30-197 and Yuletide Greetings 30-192 Transparent stamp sets, Storm 01-001 Mix and Match Cardstock, Imagine crafts/Tsukineko Kaleidacolor Spectrum Ink, Love Letter, Wedding Dress, Rose Bud, Elderberry, Morocco and Pear Tart Memento Luxe Inks, Ink Potion No.9, Brilliance Starlight Silver and Mediterranean Blue Inks, White embossing powder, wood veneer and Prisma pencils.

* Ink brayer with kaleidacolor ink and spritz with Ink Potion no.9 and brayer over wood veneer piece as seen below.
Technique flower 2

* Dry with a heat gun, cut a strip 3/4" wide and the length  of the card from the coloured veneer and stamp sentiment with Wedding Dress Memento Luxe ink and emboss. Attach to card.

* Stamp trees with the various colours of Memento Luxe ink masking off between each tree.

* Colour and add shading to trees with Prisma Pencils to finish.

I will be back tomorrow with another card using the same piece of wood inked veneer.

Hugs Cathy
x

Tuesday, 12 November 2013

I Have Exciting News!!!!


Today Imagine Crafts/Tsukineko announced their Artists in Residence for 2014...and I am so excited to say I am one of them!

I am so looking forward to working with the new team which can be found on the blog here.

I have so many projects lined up to share with you using their amazing product range and I would like to thank everyone for their congratulations on my Facebook page today.

I will be back later this week with some more inky projects, until then TTFN

hugs Cathy
X

Tagged for You

Hello everyone, today I have been busy over the last few weeks filming some new techniques that I plan to share with you very soon.  In the meantime here is a quick project that I did creating tags to send out with my giveaway prizes I hope you like them.....

Tag Trio

They have been created using Penny Black Petal Party 30-113 and Congrats 3850E  stamps, Tagged 51-007 die. The centres were coloured with Design Memory Craft Faber Castell Big Brush Markers and the flowers inked with Imagine Crafts/Tsukineko Memento Luxe inks; I just love how vibrant these inks stamp!

Pink Tag

This tag used Rosebud Memento Luxe Ink

Orange Tag

This tag used Morocco Memento Luxe Ink

Red Tag

This tag used Love Letter Memento Luxe ink

Thanks for visiting me today, I have some exciting news to share with you soon, so do hop back when you have time.
Hugs Cathy
x

Saturday, 9 November 2013

Moxie Fab Thank You Cath Blog Hop


Today is the biggest blog hop that I have ever taken part in and it is all to say a BIG thank you to Cath, who has been the Face and Heart of Moxie fab and will sadly be moving on, you should of arrived here via Joyce Mehrburg's blog here.

Cath here is my card to you.

Simply the best

I have used the following supplies to create this card:-
Penny Black's Cheerful 4160K  and Edge to Edge 30-164 stamps,  Natures Song 51-014 die, Imagine Crafts/Tsukineko Versafine Onyx Black Ink, Memento Tuxedo Black Ink, Memento Luxe Rose Bud, Elderberry and Morocco Inks, Cantaloupe and Rose Bud Fireworks sprays, Spellbinders 5 x 7 Matting Basics A S6-001, Kreinik Iron On Thread 6125, Ultrafine Flowersoft Raspberry Fizz, Liquid Pearls White Opal and Design Memory Craft/Faber Castell Big Brush Pens; White, Orange Glaze and Pink.

*Cut card blank and mount using Spellbinders Matting basics dies, and branches using Penny Black's Natures song die, added liquid pearls to ends of branches.

*Stamped flowers onto scrap card using Memento Tuxedo Black ink and then sprayed with fireworks added detail with Memento Luxe inks and big brush pens. Glued Flowersoft to centres when dry. then cut out.

*Stamped sentiment with Versafine ink and then added flowers and branches to mount.  Edged partially with Iron on thread to finish.

I will personally miss all the wonderful images that Cath finds and shares with us all on Moxie Fab, she has been a true inspiration.

Now to hop on over to the next person on the blog hop list....Rebecca Fellows here.

Thanks for visiting me along this hop.
Hugs Cathy
x (Below is a full list of the blog hoppers - incase you come across a broken link)